Home Recording Helps Trumpet Players Hear the Truth
Recording trumpet performances at home is one of the fastest ways to hear what is really happening in your playing. A recording reveals tone, time, pitch, articulation, breath noise, room sound, and small habits that disappear while you are focused on performing. You do not need a professional studio to make useful trumpet recordings. A quiet room, sensible microphone placement, careful levels, and light editing can produce files that help with auditions, lessons, practice review, ensemble preparation, or sharing a polished performance with family and friends.
A: Yes. Use a quiet room, enough bell distance, and a short test recording.
A: The microphone may be too close, aimed directly at the bell, or recording too hot.
A: Start several feet away and slightly off-axis, then adjust after listening.
A: Only lightly. Too much reverb can blur articulation and make rhythm less clear.
A: Editing can clean presentation, but large musical problems usually need another take.
A: Start with tone, time, pitch, phrase shape, and whether the performance feels confident.
A: No. Room choice, placement, and levels often matter more at the beginning.
A: Record at least two complete takes before choosing one to edit or share.
A: Export settings, processing, or missed edit points can change the final file.
A: They reveal habits you miss while playing and make the next practice goal clearer.
Start With the Purpose
A home recording can serve many different goals. You might be preparing an audition, checking a solo, making a lesson file, recording a duet part, testing equipment, or simply listening to your tone from across the room. The purpose changes how careful the setup needs to be.
If the recording is only for practice review, speed matters more than beauty. A phone across the room can be enough. If the file will be submitted, posted, or shared publicly, spend more time on room noise, microphone position, retakes, and editing. Knowing the purpose early also prevents overworking a simple practice file or underpreparing a recording that needs to represent you well.
Choose the Quietest Room First
Trumpet is loud enough that players often think the room will not matter. It does. Air conditioning, computer fans, street noise, refrigerator hum, pets, footsteps, and nearby voices can all show up during rests or soft passages. The quieter the room, the less repair work you need later.
Listen before you play. Stand still for a full minute and notice what you hear. If a sound is obvious to your ears, the microphone may capture it too. Closing doors, turning off fans, moving away from windows, or recording at a calmer time of day can improve the result immediately.
The room should not be completely dead unless that is the sound you want. A little natural space can help trumpet sound alive. The goal is to avoid harsh reflections and distracting noise, not to erase every trace of the room. If clapping in the room creates a sharp echo, try changing your playing angle or adding soft material behind or beside the microphone.
Give the Bell Some Distance
A microphone placed too close to the bell can make trumpet sound brittle, noisy, and aggressive. Start several feet away and slightly off the direct center of the bell, then adjust from there. Distance lets the tone develop before it reaches the microphone. This also gives loud notes a better chance to sound full instead of flattened by pressure at the mic during intense passages.
Watch Recording Levels Carefully
Trumpet can overload a phone, interface, or microphone quickly. If the level is too hot, loud notes may distort and cannot be repaired cleanly later. Set levels using the loudest passage in the piece, not the opening warmup note. This is especially important for pieces with sudden accents, high climaxes, or endings that grow brighter as the player gains confidence.
Leave more headroom than you think you need. A clean quieter recording can be raised later, but a clipped recording usually stays damaged. If your software or device shows meters, keep peaks safely below the top. Watch especially for accented notes, high entrances, and final phrases, since they may be louder than the test note you first played.
Use Simple Gear Well
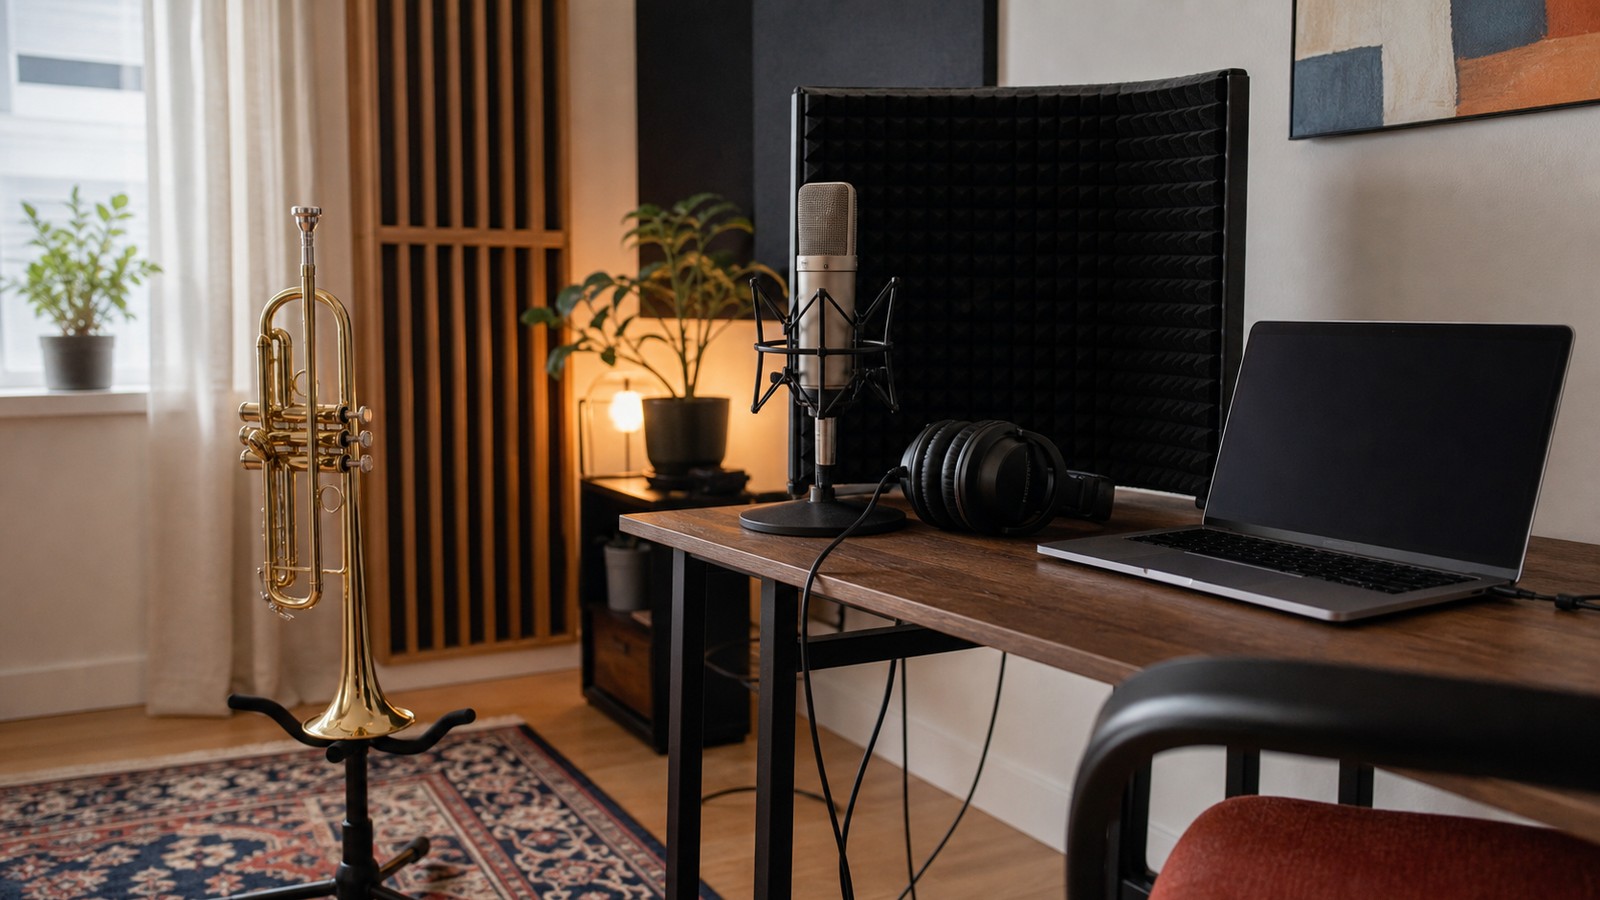
A dedicated microphone and audio interface can improve quality, but gear is not the first problem to solve. A good phone recording in a quiet room often teaches more than an expensive microphone placed badly. Start with placement, levels, and performance consistency.
If you do use a microphone, choose one that handles loud sources without harshness. Place it where the trumpet sounds balanced rather than where it looks impressive. Move the stand, record a short test, listen, and adjust.
Headphones are useful when recording with backing tracks or play-along files. They keep the accompaniment from bleeding into the microphone and make editing easier. Keep the headphone volume reasonable so the click or track does not leak out.
Make a Short Test Recording
Before recording the full performance, play thirty seconds that includes the loudest dynamic, softest entrance, highest range, and one rest. Listen back immediately. That test can reveal distortion, room echo, background noise, or a bell angle that sounds too direct.
Record More Than One Complete Take
For real performance practice, complete takes are valuable. They teach focus, pacing, endurance, and recovery. If you stop every time something goes wrong, you may never learn how the piece behaves under pressure. Complete takes also reveal whether the opening tempo, breathing plan, and final section can survive in the same performance.
Record at least two full passes before editing small details. The first take may feel tense because the microphone is on. The second or third often sounds more natural. Compare them before deciding which one deserves editing.
Listen Once Before Editing
After recording, listen to the best complete take without touching anything. Notice the big musical issues first: tone shape, tempo, pitch, phrase direction, rhythm, and confidence. Editing should support a good performance, not disguise an unclear one.
Write down timestamps or section names for spots that need attention. This keeps the editing process from becoming random. It also helps you decide whether a new take would be better than trying to patch a weak one. If the same measure fails in every take, the answer is probably more practice rather than more editing.
Many players discover that the recording sounds better than it felt while playing. Others notice habits they never hear in the moment. Both reactions are useful. The file gives information, not a verdict. Try to listen once as a musician and once as a coach, separating emotional reaction from practical next steps.
Trim Cleanly, Not Aggressively
Basic editing usually starts with trimming silence before and after the performance. Leave a little natural space at the beginning so the first note does not feel abrupt. At the end, let the final sound decay before cutting the file.
Use Light Noise Cleanup
Noise reduction can help with steady background sound, but too much processing can make trumpet tone thin or metallic. Use cleanup gently, and compare before and after. If the processed version loses warmth, reduce the effect or rerecord in a quieter space.
Do not try to remove normal performance sounds completely. Breaths, key clicks, small valve sounds, and room air are part of a real recording. The goal is to reduce distractions while keeping the trumpet believable.
Be Careful With Reverb and EQ
Reverb can make a dry room sound more natural, but it can also smear articulation and hide rhythm. Add only enough to support the tone. If the trumpet begins to sound distant or cloudy, the effect is too strong.
Equalization should also be subtle. Cutting harshness can help, but removing too much brightness may make the trumpet dull. Boosting high frequencies can add excitement, but it may also emphasize hiss, attacks, or edge.
A good rule is to make small changes, then take a short break and listen again. Fresh ears often reveal that the first edit went too far. Natural trumpet tone should remain the center of the file.
Avoid Over-Editing Musical Time
It is possible to move notes, tighten rhythms, or patch sections in some editing software, but trumpet performances can lose life quickly when edited too heavily. If timing problems are large, practice and record again. Editing should clean the presentation, not rebuild the musicianship.
Export a Useful File
Choose a file type that matches the purpose. A lesson review file can be smaller, while an audition or public performance should use a higher-quality export. Name the file clearly with piece, date, and take number so you can find it later. Clear naming also helps teachers, accompanists, or directors know what they are hearing before they press play.
Listen to the exported file from start to finish before sending it. Sometimes a bounce creates a problem you did not hear inside the editing session. Check the beginning, ending, loud peaks, soft passages, and any edit points.
Use Recordings as Practice Feedback
The most valuable home recordings are not always the polished ones. Quick weekly recordings can show whether articulation is cleaner, tone is more centered, tempo is steadier, or endurance is improving. Over time, they create a record of growth.
Listening back can be uncomfortable at first. Most players hear things they wish were better. Stay specific. Instead of deciding that the whole take is bad, name one issue and one success.
Those small observations can guide the next practice session. A recording that reveals late releases or unclear soft attacks has already done useful work. The next take becomes more informed.
Keep Sharing Context in Mind
If you share a recording with a teacher, ensemble director, or accompanist, include helpful context. Mention the piece, tempo goal, whether it is a practice take, and what feedback you want. This makes the recording easier to respond to.
Build a Repeatable Setup
Once you find a setup that works, document it. Write down the room, microphone distance, bell angle, device settings, and export choices. A repeatable setup saves time and makes future recordings easier to compare.
Consistency also helps you hear real playing changes. If the setup changes every time, you may not know whether the improvement came from better tone or a different microphone position. A stable setup turns recordings into better evidence.
Archive Takes Without Hoarding
Keep the recordings that teach you something, represent a milestone, or may need to be shared again. Delete obvious setup tests and broken false starts once you know they are not useful. A smaller, organized folder is easier to review than a pile of unnamed files.
Prepare Submission Files Carefully
If the recording is for an audition, festival, scholarship, or placement, read the instructions before exporting. Some submissions require a specific file type, unedited take, visible video, naming format, or deadline. A strong performance can be delayed by a simple technical mistake. Video requirements also change the setup, because the music stand, bell angle, lighting, and background must all look clean while the audio still sounds good.
Make the final file early enough to test it. Open it on another device, check that the full performance plays, and confirm that the volume is reasonable. Last-minute exports create avoidable stress.
The Best Home Recording Takeaway
Recording trumpet at home does not have to be complicated. Start with a quiet room, sensible distance from the bell, safe levels, and one short test. Then record complete takes and listen before editing.
Edit gently. Trim, reduce obvious noise, adjust the sound lightly, and export carefully. Avoid processing that makes the trumpet less natural than the original performance.
Most of all, use recording as a listening tool. A good home setup helps you hear what your audience hears, and that perspective can make practice more honest, focused, and rewarding over the long term.